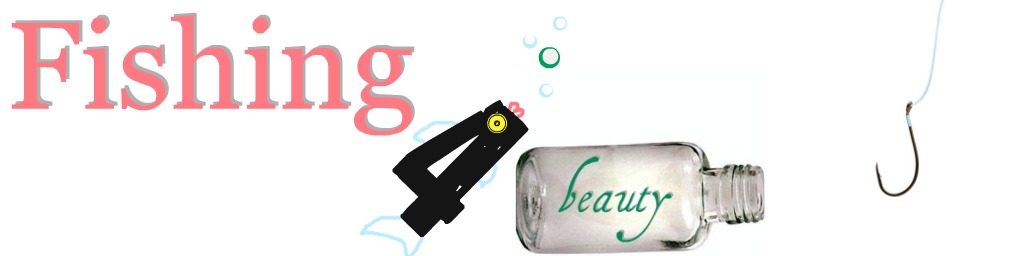
Thank you so much for your support and voting for my nail art design. The BeautyStat Nail Competition results are in and I was one of 3 winners! Check out the other amazing winning designs, Danyal's is the most amazing water marbling I have EVER seen and I'm in love with Melissa's green approach.
Thank you again. I'm still in disbelief. You guys are just too good to me;)
Friday, July 29, 2011
Wednesday, July 27, 2011

Tuesday, July 26, 2011
Mermaid Manicure Tutorial
I've been asked a few times about creating a tutorial for my "Mermaid Manicure." This tutorial was done with photographs, so this post is very picture heavy! I apologize for those of you who would rather just have the word directions, but some of you may (or may not) learn from the pictures:)

Step 1: Prep your nails, use your basecoat, etc. Let dry completely.
Step 2: Paint your nails in your base color. I used Sinful Colors Open Seas ($1.99). Make sure you achieve the desired opacity in as few coats as possible. I used 2 coats. Let dry completely.
Step 3: Get your sponge applicator. (I got mine in this kit for $1.99 for the sole purpose of destroying it with polish) Unscrew the lid of your layering polish and scrape the polish off the brush onto your applicator. My layering polish was Sinful Colors Nail Junkie ($1.99).
Step 4: Lightly dab polish onto your nail (at the tip, the left or right corner, one side, or your nail bed). As you dab polish concentrate on one part of the nail, I did the tip, and lightly fade it out before getting more polish.

Step 5: Wait between layers for polish to dry or it will become tacky and get indents in it.
Step 6: Continue adding layers until the desired darkness/concentration of layering polish is achieved. Do not forget to "fade" while using your sponge applicator.
*Some people swear by sponging a thin layer on 3/4 of the nail, wait for it to dry. Sponge polish on 1/2 the nail, wait for it to dry. Sponge on last 1/4. See illustration below*
Step 7: Finish with your favorite topcoat. This not only helps your manicure to last longer but it also tends to mask any minor flaws in your sponging.
Here is the illustration I created on how to sponge. Keep in mind that you can create a gradient by using polishes of slightly different colors, just like in the picture.

Let me know what other tutorials you would like to see. I can always give a manicure a shot, even if it doesn't turn out perfectly;)
This is what you will need:
-base/background color
-glitter polish or another color
-sponge applicator (like the cheap-o things you get with eye shadows & never use)
-topcoat (I guess this is optional, but it will help your mani to last longer & will smooth it out)
Optional:
-basecoat
-basecoat
-remover pen for cleanup

Step 1: Prep your nails, use your basecoat, etc. Let dry completely.
Step 2: Paint your nails in your base color. I used Sinful Colors Open Seas ($1.99). Make sure you achieve the desired opacity in as few coats as possible. I used 2 coats. Let dry completely.
Step 3: Get your sponge applicator. (I got mine in this kit for $1.99 for the sole purpose of destroying it with polish) Unscrew the lid of your layering polish and scrape the polish off the brush onto your applicator. My layering polish was Sinful Colors Nail Junkie ($1.99).
Step 4: Lightly dab polish onto your nail (at the tip, the left or right corner, one side, or your nail bed). As you dab polish concentrate on one part of the nail, I did the tip, and lightly fade it out before getting more polish.

Step 5: Wait between layers for polish to dry or it will become tacky and get indents in it.
Step 6: Continue adding layers until the desired darkness/concentration of layering polish is achieved. Do not forget to "fade" while using your sponge applicator.
*Some people swear by sponging a thin layer on 3/4 of the nail, wait for it to dry. Sponge polish on 1/2 the nail, wait for it to dry. Sponge on last 1/4. See illustration below*
Step 7: Finish with your favorite topcoat. This not only helps your manicure to last longer but it also tends to mask any minor flaws in your sponging.
Here is the illustration I created on how to sponge. Keep in mind that you can create a gradient by using polishes of slightly different colors, just like in the picture.

Let me know what other tutorials you would like to see. I can always give a manicure a shot, even if it doesn't turn out perfectly;)
Monday, July 25, 2011
Manicure Monday
First, I would like to thank you for getting the word out there to vote for me in BeautyStat's Competition. I am so grateful for those of you who have blogged, tweeted, and facebooked about it:) Now, on with the Monday Mani;)
I will be featuring the other Confetti polish from my cousin today. This one was actually swatched a while ago, but got lost on my camera somehow. This polish is sheer and shimmery with flecks of fine glitter in it. Here is a picture of its opacity (or lack of) in 1, 2, and 3 coats.

My index finger had one coat, middle finger received two, while my ring and pinkie fingers were lacquered with three coats. Now here she is in her 3 coat glory.
 I apologize for the bubbles, I did this too quickly while sitting in front of a fan *gasp.* Shame on me!
Review:
Application: easy, smooth the polish is rather thick but not pasty. It was also fast drying.
Opacity: sheer coverage in three coats
Color: a glittery frosted light pink with gold, pink, and green flecks. Sheer, great for layering.
Finish: glossy finish
Durability/Wear: long lasting (i wore it for a full week!)
Truth be told, Dreamdate grew on me as I wore her. At first I felt like a little girl wearing Barbie shimmer polish. But eventually I realized that she seemed like a soft shimmery neutral. I probably will wear this one more often than originally expected. I would love to see this polish over a dark color, which I will probably dig out in the fall:)
I will be featuring the other Confetti polish from my cousin today. This one was actually swatched a while ago, but got lost on my camera somehow. This polish is sheer and shimmery with flecks of fine glitter in it. Here is a picture of its opacity (or lack of) in 1, 2, and 3 coats.

My index finger had one coat, middle finger received two, while my ring and pinkie fingers were lacquered with three coats. Now here she is in her 3 coat glory.

Review:
Application: easy, smooth the polish is rather thick but not pasty. It was also fast drying.
Opacity: sheer coverage in three coats
Color: a glittery frosted light pink with gold, pink, and green flecks. Sheer, great for layering.
Finish: glossy finish
Durability/Wear: long lasting (i wore it for a full week!)
Truth be told, Dreamdate grew on me as I wore her. At first I felt like a little girl wearing Barbie shimmer polish. But eventually I realized that she seemed like a soft shimmery neutral. I probably will wear this one more often than originally expected. I would love to see this polish over a dark color, which I will probably dig out in the fall:)
Wednesday, July 20, 2011

Tuesday, July 19, 2011
What?!? Me?!? A FINALIST?!? (please vote)
I am in shock. Like complete disbelief. My first presentable shot at nail art and I'm a finalist?!?! I am a finalist in BeautyStat's Nail Competition! I would be forever grateful if you would vote for me. I am the last one listed. Please just take a minute and vote.
Here are the website's instructions on how to vote: Simply post a comment below telling us WHO you voted for. And don’t forget to post this contest on your Facebook and Twitter page so that your friends can vote too.
So just scroll down to the bottom and say what you liked about my hand-painted lace manicure:) Then please let everyone you know to vote! Thank you:)
http://www.beautystat.com/site/headline/beautystats-first-nail-polish-competition-finalists-vote-for-your-favorite-lacquer-photo-swatch-now/
Ps. There may or may not be a giveaway if I win;)
Sunday, July 17, 2011
Manicure Monday

Review:
Application: easy, smooth the polish is rather thin, but not watery. It was also fast drying.
Opacity: sheer coverage in three coats
Color: a pale, sheer pink
Finish: glossy finish
Durability/Wear: long lasting
Here is a comparison of Confetti Pink Paradise to OPI Bubble Bath. Confetti polishes retail at $1.99 at most CVS Pharmacies.
What's your favorite "everyday" polish?
Thursday, July 14, 2011
Handpainted Lace Manicure
First, I must admit that since I'm rather new to this entire nail polish world I am not very good at nail art. Sure I took a couple of art classes in high school (10 years ago) and I would like to say that I wasn't too bad at it. But for some reason when it comes to painting fingernails and toenails everything ends up looking like it was done while riding a donkey down the Grand Canyon!
Second, I do not own any spiffy nail art tools. No stamping plates, dotting tools, brushes, decals, strips, or filmo slices here! I would definitely jump at any opportunity to try ANY and ALL of the above listed tools, but nails on a budget (yay med. school) sometimes don't allow for such things:)
I am basically left with my meager polish collection and a cheap ($1.99ish) NYC makeup brush kit that I bought to destroy with polish. Up until today, my nail art attempts have been too embarrassing to post (although I have chosen not to spare you of my sad attempts at cool manicures).
Without further ado, my classy, hand-painted lace beauty:
 I am VERY pleased with the result of this. It may not be perfect, but it's progress!
What kind of nail are have you had success with (sans tools)? What other kinds of nail art would you like to see me attempt?
Second, I do not own any spiffy nail art tools. No stamping plates, dotting tools, brushes, decals, strips, or filmo slices here! I would definitely jump at any opportunity to try ANY and ALL of the above listed tools, but nails on a budget (yay med. school) sometimes don't allow for such things:)
I am basically left with my meager polish collection and a cheap ($1.99ish) NYC makeup brush kit that I bought to destroy with polish. Up until today, my nail art attempts have been too embarrassing to post (although I have chosen not to spare you of my sad attempts at cool manicures).
Without further ado, my classy, hand-painted lace beauty:

What kind of nail are have you had success with (sans tools)? What other kinds of nail art would you like to see me attempt?
Wednesday, July 13, 2011
Monday, July 11, 2011
Manicure Monday
This week's Manicure Monday is actually a polish that is not in my personal collection, it's my mom's polish:) Thank you for lending her to me, Mom!
 Review:
Application: easy, smooth the polish is rather thin, but not watery. Slightly streaky but it wasn't the formula is was the frosted metallic finish that caused that. It was also fast drying.
Opacity: full coverage in two coats
Color: a frosty metallic greyish silver. There are definitely hints of purple, taupe and pewter too. Would recommend using a basecoat (just in case)
Finish: glossy finish
Durability/Wear: long lasting
I apologize for the poor paint job. I did it rather quickly and then cleaned her up after taking pictures (Why didn't I do that before? Good question!).
Wednesday, July 6, 2011

Tuesday, July 5, 2011
Short Nails
Last week I volunteered as a camp counselor at a week long summer camp that my church [growing up] runs. It was wonderful. I love the nostalgia of it. I have been going there almost every year since I was 9!
I love camp. However, my nails never love camp. Between swimming in a pond, playing all sorts of games, and digging for clay in a creek my nails always end up looking quite sad by the time I return home. This year was no different. This year was actually worse as far as wear and tear on nails. Within hours of arriving we had to weed the beach at the pond and the sand volleyball court. A few hours later, I ended up chopping off my nails realizing they would not come clean.
I am not someone who "needs" to have long, nails. My nails were actually rather short anyway. It did make me sad however because it took me so long to grow them to their "perfect" length. (Working at a preschool does not agree with having nails of any length)
Now I will search my stash of polish for a great color for my short nails. What color do you like to paint your nails if/when they're short?
Monday, July 4, 2011
Manicure Monday
Since I'm relatively new to the wonderful world of beauty, I definitely struggle with nail art & tricky manicures. Because of this, I chose to showcase my favorite red polish for the 4th of July. Here is Sinful Colors Ruby Ruby:
 Review:
Application: easy, smooth the polish is rather thin, but not watery. It was also fast drying.
Opacity: full coverage in two coats
Color: bright red cream, an amazing true red. Pretty neutral, not too cool or too warm. Would recommend using a basecoat (just in case)
Finish: glossy finish
Durability/Wear: long lasting
Isn't she lovely? What is your favorite or go-to red polish?
Subscribe to:
Posts (Atom)